And... here is how we did it.

Here is my first run at making a fondant wedding cake. My mom, sister and sister-in-law all helped to make this cake. So we all take credit for this beauty! My sister-in-law supplied the cake pans for my nieces wedding cake.

My mother bought a cake core for the 14 inch round bottom layer. I am glad we used it. The core is for the center of the cake so that there isn't a big dip in the center where the cake isn't baked all the way through. The core allows for the cake to bake evenly.

We used 2 huge boxes of dense cake mix plus a little extra to create 3 double layer cakes. All you add is water! It was my first time with this particular cake mix. I loved using it!

Here is our first 14 inch cake cooking in the convection oven.

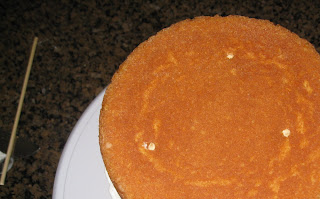
Here is the cake after it cooked. We took the core out and it left a hole. We filled the hole with the cake that baked inside the core.

The 14 inch cake came out of the pan beautifully! We were so relieved.

Here is a picture of the cake core and the top 6 inch tier of the cake cooling on a rack. Fabric was placed under it so that it wouldn't stick to the grooves in the cooling rack. Good quality paper towels would have worked well too.

Here is the top 6 inch tier of the wedding cake with frosting in the center. So far so good.

We placed 3 wooden dowels in the top tier of the cake to support itself and keep the cake from sliding. We are expecting hot weather for the Wedding.

I drew a heart in the butter cream frosting on the bottom 18 inch foam board for good luck. The frosting helps the 14 inch cake stick to the foiled foam board better. We didn't want any of the cakes sliding of the board.
 Here is the middle tier of the wedding cake. We piped firm butter cream icing around the edges to create a dam effect. Then we put medium-thin icing in the center and smoothed it out with a spatula.
  Above is a wonderful Wilton pastry bag that we used to cover the entire cakes with frosting.
  Using the Wilton pasty bag and large frosting tip we circled the cake in butter cream frosting. It kind of looks like a mummy don't you think? Don't worry it gets better!
This creates a crumb coat of frosting when you smooth it out with a frosting spatula. We took off any excess icing and smoothed it as best we could then let it sit for 20 min. which allowed the frosting to harden.

Once hard, we used parchment paper to smooth out the rough edges. I love that trick. Doesn't it look much better. No hard lines. We wanted the frosted cake to be as smooth as possible so that the lumps and bumps wouldn't show up under the fondant.

Using Satin Ice White/Vanilla fondant purchased at Orson Gigi, we rolled out a large circle of fondant. The fondant rolled out was measured by the length of the diameter, plus 2x the side length, plus 2 inches. We smoothed out the top and sides with a fondant smoother and cut off any excess fondant hanging down below the cake base.
 Orson Gigi had these cake dowels on hand so we cut them down to fit the size of each tier. We placed them in each tier to support each layer. Fondant is heavy! The bottom 14 inch cake weighed 18 lbs. The middle 10 inch cake weighed 10 lbs. And the top 6 inch tier weighed 3lbs. For a GRAND TOTAL of 31 lbs. Can you believe it!
We decorated the cake with rolled fondant pearl balls. Two layers of ribbon were added around the base of each layer to add color and texture.

Pearl dusting powder helped to make the fondant pearls really glimmer.

Here is the top tier with beautiful flowers.
Isn't it great! The cake turned out way better than expected. Thankfully!

My mom's friend graciously put the flowers on the top of the cake. The flowers added just the right touch!


Here is the 31 pound beauty!


Pretty good for our first wedding cake right?
It took 4 of us to pull this one off.
We couldn't have done it alone.

Phew! We did it!
The wedding reception turned out beautiful.


Wow! I have a feeling it won't be your last (you have a lot of nieces!) Now you're in trouble - someday, after you've done 100 wedding cakes - you'll look back on this and smile! Great job!
ReplyDeleteWhat buttercream recipe do you use?
ReplyDeleteI use the Wilton Butter Cream recipe found in the Wilton Decorating Basics Lesson Plan Course book. So good. Holds up well.
Delete