Friday, January 27, 2012

Young Women LDS Torch Handout

 I volunteered to make a handout for New Beginnings next week. So I got this brilliant idea from my sister to make an edible torch for the Young Women of my ward. 
 Our theme for the new year is ARISE AND SHINE FORTH
I love the theme and it reminds me of the color yellow so I placed lemon drops in the long bags. I purchased the bags from a gal in my ward who sells "Stampin up" supplies. I love these bags! They are perfect for small treats. You can use them for any Holiday or occasion. The ideas are limitless.
 After I filled all the bags, I assembled the torches toppers. After printing the "Arise and Shine" theme on Label paper, I stuck them on the colored card stalk. So the theme circles were like little stickers. It saved me time gluing each circle on the card stalk.

 Here are some extra handouts without the torch for the ladies. ( I ran out of torches).
 I love the look of the young woman face in the flames! It really does look like a torch. Plus, it is great way to reinforce the torch motto for New Begginings and to introduce the Personal Progress program to the girls with it's different values.
This is the basket of handouts for the Young Women to take home.

FYI: I printed the images on Office Depot white laser shipping labels. The actual size is the same as Avery 5163 labels. Measuring 2 in. by 4 in. Then I used a medium circle punch to punch out the circles. I hand cut each YW torch but if you had a large punch you could cut them out as a rectangle or oval. Sorry I don't have the link to access the printable at this time. 

The pictures below show the Gym and how the YW leaders decorated for our New Beginnings.
I love the theme ARISE & SHINE FORTH! 
We used the color scheme of the torch flame; Red, Orange and Yellow.
 We decorated with warm lamps and various sized flickering LED candles. The warm light added to the ambiance of the evening.
 Here is a view of the right side of the stage.
This is our food table. The Young Women Leaders brought the Yellow desserts out when the speakers were through. It looked really nice that evening.

Saturday, January 21, 2012

Penguin Igloo Birthday Cake

 Fondant Penguin
 My family and I made this birthday cake for my sweet son. The whole cake accidentally fell over on the counter and got smashed up a bit and this is the cake after placing it back on the cake stand. It is a bit messy, but still cute for my son. My husband and I made the upper penguins and my 3 small children, ranging from 8 to 2, made the lower penguins. I thought it was fun to have them help with this cake. They loved it as well!

Pinwheel Baby Blanket

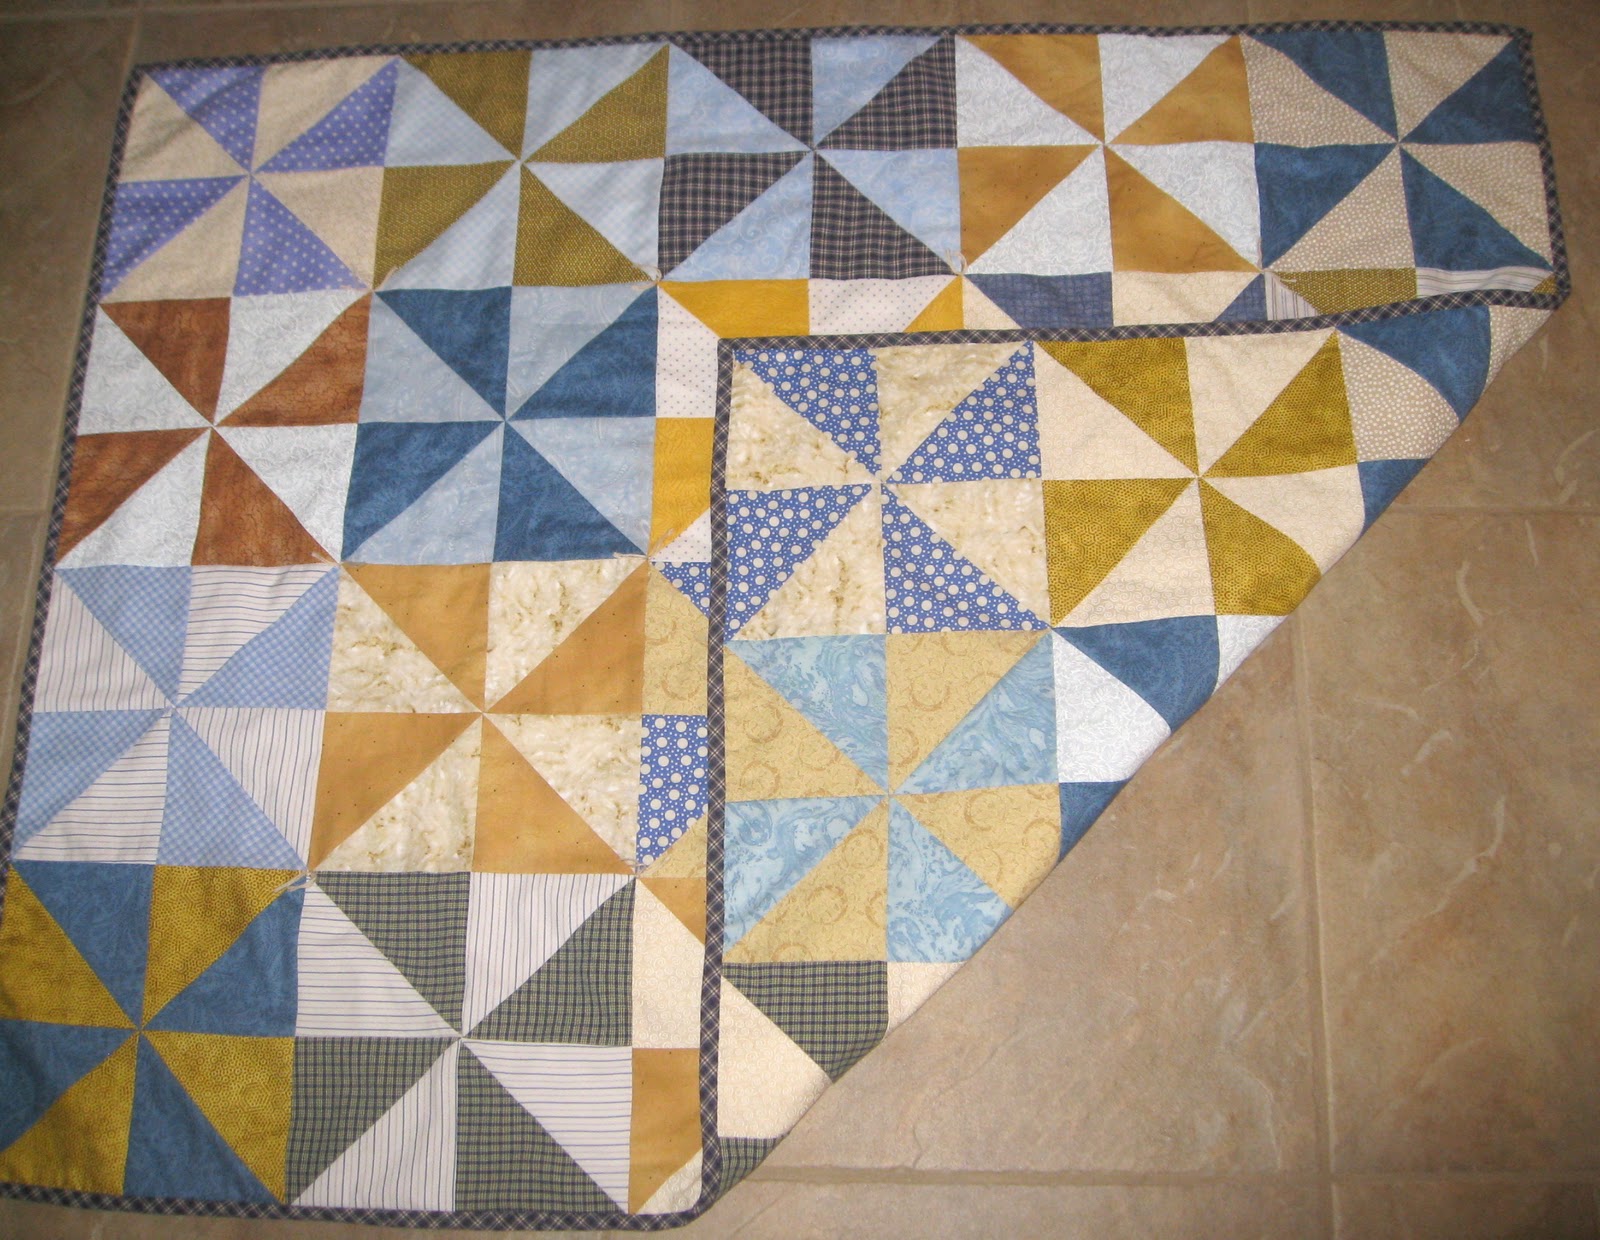
 This is the completed pin-wheel baby blanket!
 Here is the fabric scraps I began with. I added some fabric from Men's Dress shirts and cut them up into squares.
 After cutting the fabric into squares, I placed two fabric squares right sides together and sewed 2 parallel lines down the center. 
 Here are the parallel lines completely sewn.
 Next, I used a fabric straight edge ruler and cut the center line. There are 2 triangles now. Once opened up, it looks like a square with 2 triangles of different colors stitched together. 
 Here is the front of the quilt when it was stitched together. 
 Then I sewed the hand made binding on to back side of the blanket. 
 I created my own binding out of my Brother-in-laws Dress shirt. I wanted to have a sentimental factor in the blanket, so that is why I used part of this men's dress shirt. Plus, I love to Reduce, Reuse and Recycle! I can't let a good thing go to waste.
I used my hands to stitch the binding onto the front side of the quilt. I like the hidden stitches and the added love into the blanket.
 Here is the completed blanket! Made with new material and some Men's Dress Shirts. 
 I backed the blanket in the similar pinwheel pattern and I loved how it turned out. 
 It was fun to try out a new quilt pattern and use up some fabric as well!
Here is a picture of the men's shirt and the completed blanket. The shirt was turned into binding.


A gift of time, is a gift of love!

Baby Boy Blue Patchwork Blanket

 I gave this blanket to a lovely family member who was having a baby boy. I constructed the quilt using some purchased material as well as some old shirts that my sister-in-law had given me. I wanted this blanket for their son to have some sort of sentimental value to it. By adding the parents clothing squares I was able to accomplish my goal.
Every baby needs a soft blanket!


Friday, January 20, 2012

Quilted White Fondant Cake

This was my first attempt at making a square fondant cake with a quilted pattern on it. I have found that Square cakes are a bit tricky, but with a little patience and practice it can be done.

I loved adding the sugar pearls on the cake. 
The pearls made the cake look elegant and was a great finishing touch.

 This was a fun way to visualize and sample what a tier of a wedding cake would look like.

Wednesday, November 9, 2011

Shabby Chic Headboard and Foot-board Makeover

Headboard BEFORE...
Headboard AFTER
Headboard before
 Footboard Before...


 Bedroom furniture primed and painted. So beautiful and Green! The Perfect color for a Shabby Chic little girls room. I love mixing some old furniture with a new bedspread.
This was an old canopy bed for my neighbors daughter. The furniture did not come with the canopy nor does my daughter need one. Although, I always dreamed of having one of my own when I was a little girl. The bed looks great without it. 
 The tall spindles make this bed really stand out in the room. My daughter loves it.

An added touch.
 A flower ball to hang on the spindle!

Feminine Nightstand Makeover

BEFORE...
 DURING...
 AFTER!
Thank heavens for amazing neighbors. My dear neighbors were sending a bedroom set to Deseret Industries and they offered it to my husband and I. I loved the bones of the nightstand and headboards so I said yes. I have loved them ever since. I lightly sanded the pieces and then painted using a coat of primer. I waited patiently for them to dry then used a can of free paint I had in the garage and painted it Green with a foam brush. It is a nightstand makeover with a new soft green look. Much better!

Small White Dresser Redo and Redo again...

BEFORE

 AFTER!

 So I began distressing this small dresser....
 Then I thought I would antique it.....not the look I was going for so I painted some more. 

 Then I added dark Jacobean min-wax stain with cloth. Cool look, but too rustic for my home. Plus my husband said it looked fake. I thought it was sort of unique looking.  So... on with more layers of min-wax stain and 4 new legs to add height to the dresser.  This time I applied the stain with a cheep foam brush. I applied thick layers of Dark Walnut stain that I purchased at Home Depot. I had to let my project sit in the garage for weeks to dry. And I mean weeks! I am not a very patient person but it turned out well.
Lovely looking I think. Not perfect, but a much needed improvement!

Friday, November 4, 2011

My Sweet Son's Football Party

LET THE GAMES BEGIN!!!
 My son wanted a Football Party so...I searched the Internet for fun football party ideas and threw him a party! I am not the biggest fan of planning kids birthday parties but I felt it was time for my son to have one.
 We decorated felt flags with the boys favorite football teams, face painted, had an amazing obstacle coarse, opened presents, threw a pinata around (like a hot potato), and ate cake! I think the boys had fun and they played together well.
Here is my son's requested football cake with green turf looking cupcakes. I had fun making these little treats. I made the MVP circles for the cupcakes out of cupcake holders. I cut the bottom out into a circle shape and layered it on card stalk. 
 I made invitations to look like footballs with the field in the center.

WHAT TIME IS IT? IT IS GAME TIME!

My husband ran football drills with the boys. He had them do warm-up knee drills, crunches, and jumping jacks then they were off to the obstacle coarse.
Next they did Cone Drills: The boys ran forward, side-ward, backward, and all around orange cones in the yard.  Then it was off to field goal training. The boys kicked their own football through a goal post my husband made hours before the party.
Finally they had Receiver Training: My husband threw a football to each boy who stood in a hula-hoop. The goal was to stand in the hula hoop and catch a football 4 times. If they caught 4 balls my husband would do sit ups. The boys really liked being active and playing hard outside. Despite the cold the boys were smiling and laughing as they did all the football drills and it was very entertaining to watch.