Saturday, January 21, 2012

Pinwheel Baby Blanket

 This is the completed pin-wheel baby blanket!
 Here is the fabric scraps I began with. I added some fabric from Men's Dress shirts and cut them up into squares.
 After cutting the fabric into squares, I placed two fabric squares right sides together and sewed 2 parallel lines down the center. 
 Here are the parallel lines completely sewn.
 Next, I used a fabric straight edge ruler and cut the center line. There are 2 triangles now. Once opened up, it looks like a square with 2 triangles of different colors stitched together. 
 Here is the front of the quilt when it was stitched together. 
 Then I sewed the hand made binding on to back side of the blanket. 
 I created my own binding out of my Brother-in-laws Dress shirt. I wanted to have a sentimental factor in the blanket, so that is why I used part of this men's dress shirt. Plus, I love to Reduce, Reuse and Recycle! I can't let a good thing go to waste.
I used my hands to stitch the binding onto the front side of the quilt. I like the hidden stitches and the added love into the blanket.
 Here is the completed blanket! Made with new material and some Men's Dress Shirts. 
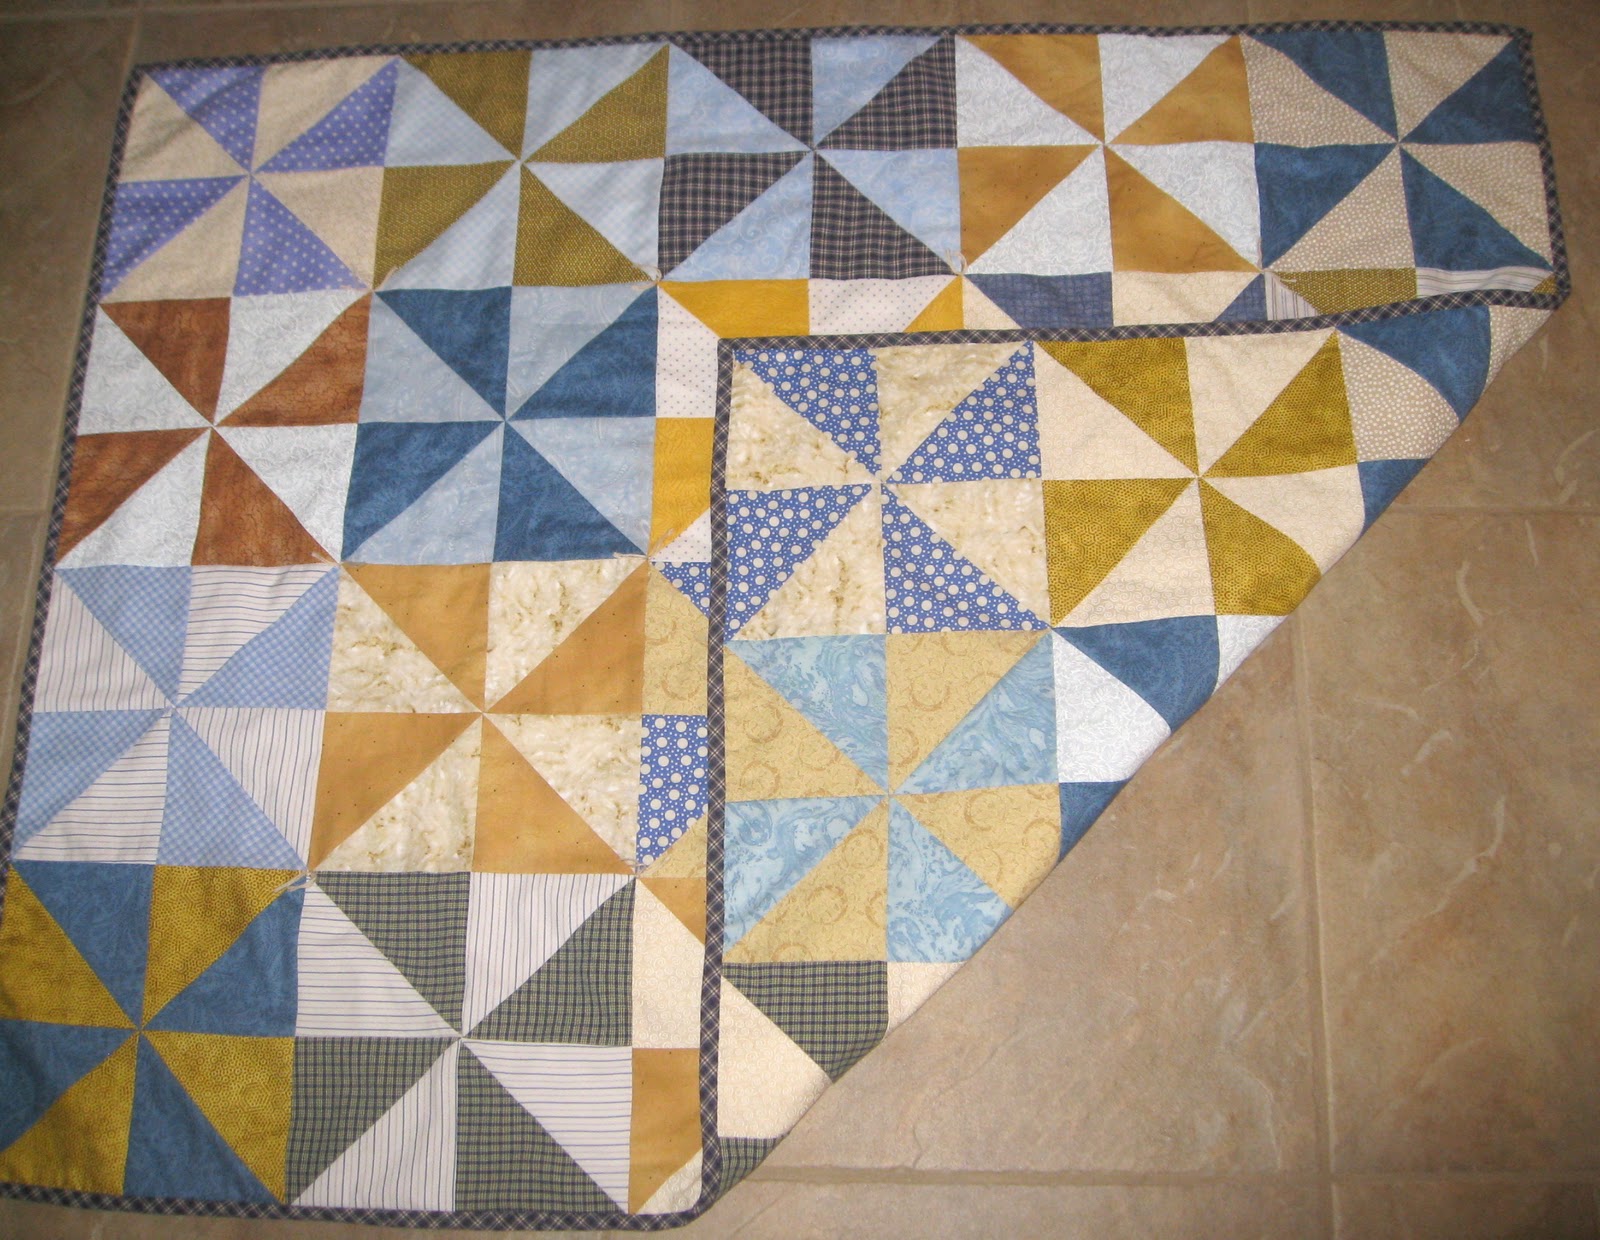
 I backed the blanket in the similar pinwheel pattern and I loved how it turned out. 
 It was fun to try out a new quilt pattern and use up some fabric as well!
Here is a picture of the men's shirt and the completed blanket. The shirt was turned into binding.


A gift of time, is a gift of love!

Baby Boy Blue Patchwork Blanket

 I gave this blanket to a lovely family member who was having a baby boy. I constructed the quilt using some purchased material as well as some old shirts that my sister-in-law had given me. I wanted this blanket for their son to have some sort of sentimental value to it. By adding the parents clothing squares I was able to accomplish my goal.
Every baby needs a soft blanket!


Friday, January 20, 2012

Quilted White Fondant Cake

This was my first attempt at making a square fondant cake with a quilted pattern on it. I have found that Square cakes are a bit tricky, but with a little patience and practice it can be done.

I loved adding the sugar pearls on the cake. 
The pearls made the cake look elegant and was a great finishing touch.

 This was a fun way to visualize and sample what a tier of a wedding cake would look like.

Wednesday, November 9, 2011

Shabby Chic Headboard and Foot-board Makeover

Headboard BEFORE...
Headboard AFTER
Headboard before
 Footboard Before...


 Bedroom furniture primed and painted. So beautiful and Green! The Perfect color for a Shabby Chic little girls room. I love mixing some old furniture with a new bedspread.
This was an old canopy bed for my neighbors daughter. The furniture did not come with the canopy nor does my daughter need one. Although, I always dreamed of having one of my own when I was a little girl. The bed looks great without it. 
 The tall spindles make this bed really stand out in the room. My daughter loves it.

An added touch.
 A flower ball to hang on the spindle!

Feminine Nightstand Makeover

BEFORE...
 DURING...
 AFTER!
Thank heavens for amazing neighbors. My dear neighbors were sending a bedroom set to Deseret Industries and they offered it to my husband and I. I loved the bones of the nightstand and headboards so I said yes. I have loved them ever since. I lightly sanded the pieces and then painted using a coat of primer. I waited patiently for them to dry then used a can of free paint I had in the garage and painted it Green with a foam brush. It is a nightstand makeover with a new soft green look. Much better!

Small White Dresser Redo and Redo again...

BEFORE

 AFTER!

 So I began distressing this small dresser....
 Then I thought I would antique it.....not the look I was going for so I painted some more. 

 Then I added dark Jacobean min-wax stain with cloth. Cool look, but too rustic for my home. Plus my husband said it looked fake. I thought it was sort of unique looking.  So... on with more layers of min-wax stain and 4 new legs to add height to the dresser.  This time I applied the stain with a cheep foam brush. I applied thick layers of Dark Walnut stain that I purchased at Home Depot. I had to let my project sit in the garage for weeks to dry. And I mean weeks! I am not a very patient person but it turned out well.
Lovely looking I think. Not perfect, but a much needed improvement!

Friday, November 4, 2011

My Sweet Son's Football Party

LET THE GAMES BEGIN!!!
 My son wanted a Football Party so...I searched the Internet for fun football party ideas and threw him a party! I am not the biggest fan of planning kids birthday parties but I felt it was time for my son to have one.
 We decorated felt flags with the boys favorite football teams, face painted, had an amazing obstacle coarse, opened presents, threw a pinata around (like a hot potato), and ate cake! I think the boys had fun and they played together well.
Here is my son's requested football cake with green turf looking cupcakes. I had fun making these little treats. I made the MVP circles for the cupcakes out of cupcake holders. I cut the bottom out into a circle shape and layered it on card stalk. 
 I made invitations to look like footballs with the field in the center.

WHAT TIME IS IT? IT IS GAME TIME!

My husband ran football drills with the boys. He had them do warm-up knee drills, crunches, and jumping jacks then they were off to the obstacle coarse.
Next they did Cone Drills: The boys ran forward, side-ward, backward, and all around orange cones in the yard.  Then it was off to field goal training. The boys kicked their own football through a goal post my husband made hours before the party.
Finally they had Receiver Training: My husband threw a football to each boy who stood in a hula-hoop. The goal was to stand in the hula hoop and catch a football 4 times. If they caught 4 balls my husband would do sit ups. The boys really liked being active and playing hard outside. Despite the cold the boys were smiling and laughing as they did all the football drills and it was very entertaining to watch. 

Wednesday, October 5, 2011

Adding Elastic Waistband to Shorts

 Soooo...my son won't wear shorts that are loose. Delema...he has a pair of shorts given to him by his Aunt that are darling but..... that are 3-4 inches too loose in the waist. I began tackling this project head on. I got some elastic from another pair of pants that I was throwing away and cut it into 2 pieces. Then I cut a slit in the inside wasteband area of the shorts.
 I hand sewed a button hole looking slit. not too professional but who is going to look there right?
 Then I hand sewed a button next to the hole. Pretty tricky considering I didn't want to sew through the other side of the shorts.
 I inserted the elastic band about 3-4 inches and sewed it in place. I sewed underneath a belt loop so that no one would know that we changed the inside of the shorts.
 I slipped the button onto the elastic and VOILA! Shorts that fit! 
My son now wears these shorts a couple times a week.

Simple & Sweet Apple Turnovers

SO DELICIOUS APPLE TURNOVERS!!!

Really simple to make: 1 Can apple pie filling(chop coarsely), 
1 Box Refrigerated Pastry Pie crust (2 circles per package), 1 egg, powdered sugar, 
milk, water, almond extract.

Cut out circles with a glass or small bowl. Use knife to score edges. Fill center with 1 TBls. filling.
Wet seam with a small amount of water and press closed.


Score edges with fork or I used a Wilton decorative stitching tool (used for cakes & fondant). 
It is pictured below. 

Beat egg with 1 tsp. Milk and brush on the top of the turnover. 
Yum! The egg wash created this nice browning effect after they were cooked in the oven. So awesome! 
SOOOOO TASTY LOOKING!
After the turnovers cooled for a while, I glazed them with powdered sugar and 1tsp. water and 1tsp. almond extract. After I mixed the icing I poured the mixture into a Ziploc bad and cut a small hole in the corner. I used it as a make shift pastry bag. Then I drizzled the topping on and allowed it to dry.


Heavenly treats!
Warm, sweet and tasty treat for the Fall season. You can't beat these treats for the holidays.
These beauties remind me of the little Wonder Bread pies that my Dad used to bring home when I was a little girl. What a treat they were. They package up nicely for a great gift.